How to Stop Water Leaking Under Samsung Refrigerator Crisper Drawers
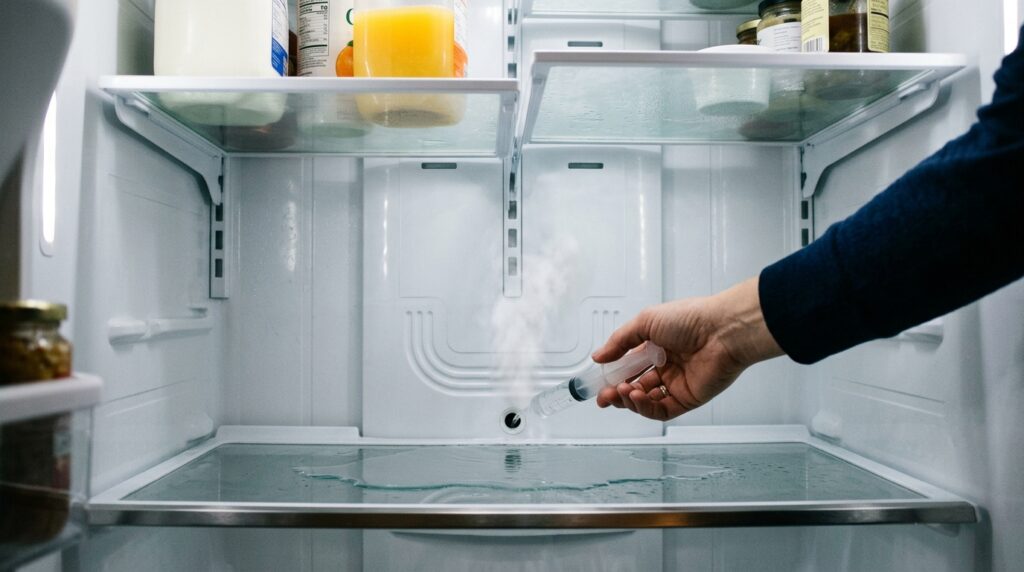
A pool of standing water or thick sheet of solid ice beneath the vegetable crisper drawers is the most frequent defect in Samsung French-door and bottom-freezer refrigerators. The root cause is mechanical: during the automatic defrost cycle, water rolls down the cooling coil into a small metal drain trough. Because the factory aluminum drain heater probe is too short, cold ambient air freezes water inside the drain opening, causing successive defrost cycles to overflow into the cabinet floor.
Required Tools & Upgrades
- Phillips #2 Screwdriver: For removing the interior evaporator cover.
- Heat Gun or Hair Dryer: To safely melt iced panel tabs.
- Extended OEM Defrost Drain Clip (Part #DA61-06796A): 1 unit ($6 upgrade part).
- 60mL Syringe with 1/4-inch Flexible Vinyl Tubing: 1 unit for hot water flushing.
- Clean Towels: To absorb melted runoff.
Step-by-Step Defrost Drain Flush & Clip Upgrade Protocol
Remove Drawers & Lower Rear Panel
Empty the refrigerator compartment. Pull out both crisper drawers and the center shelf support. Remove the two Phillips screws securing the white interior rear panel (“Twin Cooling Plus” cover). Important: Do not yank the plastic cover off; ice behind the panel often freezes the styrofoam insulation to the aluminum coils. Use a hair dryer on low along the panel seams for 3 minutes to melt ice bond before gently unclipping.
Unplug Wiring Harness & Clear Basin Ice
Disconnect the multi-pin fan and sensor harness plug at the top of the cover and set the panel aside. You will see a solid block of ice filling the aluminum collection gutter directly beneath the cooling fins. Use your hair dryer to completely melt this ice dam, blotting water with towels as it liquefies.
High-Pressure Hot Water Syringe Flush
Locate the small round 3/8-inch drain hole in the center of the metal trough. Insert your flexible vinyl tubing connected to the 60mL syringe loaded with steaming hot tap water (140°F). Force hot water down the hole. You will hear a sudden gurgle as the ice slug in the drop pipe clears and empties into the compressor drain pan beneath the unit.
Install the Extended Drain Clip
Locate the short factory aluminum tab hanging down from the defrost heating element into the drain mouth. Unbend and remove it. Install the redesigned, extended copper/aluminum drain clip (DA61-06796A), clipping it firmly onto the defrost heating rod so the metal finger extends 1.5 inches down into the drain tube. When the defrost heater energizes, it now conducts heat deep into the pipe, permanently preventing ice freeze-ups.
Frequently Asked Questions
Why does the water freeze again after a week if I only melt the ice?
Simply melting the visible ice only solves the symptom. Without installing the extended conductive drain clip (DA61-06796A) or checking the rear duckbill drain valve for sticky mineral clogs, cold air circulating across the metal trough will re-freeze within 4 to 7 defrost cycles.
Need Complete Emergency Restoration Sequences?
Get instant access to the Home Rescue Bible with 240+ pages of manufacturer error code maps, chemical ratios, and repair shortcuts.
Download Complete Bible ($39) →