- Quick Answer: How to Clean a Smelly Garbage Disposal
- 1. Why Do Garbage Disposals Smell So Bad?
- 2. Step One: The Physical Scrub (Ice and Salt Method)
- 3. Step Two: The Chemical Flush (Baking Soda & Vinegar)
- 4. Step Three: The Forgotten Zone (Cleaning the Splash Guard)
- 5. Step Four: The Fresh Finish (The Lemon Method)
- 6. Alternative Methods and Advanced Cleaning Hacks
- 7. Troubleshooting: Reset Buttons, Brands, and Plumbing Problems
- ❓ Frequently Asked Questions
- 8. The Chemistry of Deodorization: Why These Ingredients Work
- 9. Environmental and Septic System Considerations
- 10. Comprehensive Guide to Odor Identification
- 11. The Anatomy of a Garbage Disposal
- 12. Long-Term Strategies for a Pristine Kitchen Sink
- Author
Quick Answer: How to Clean a Smelly Garbage Disposal
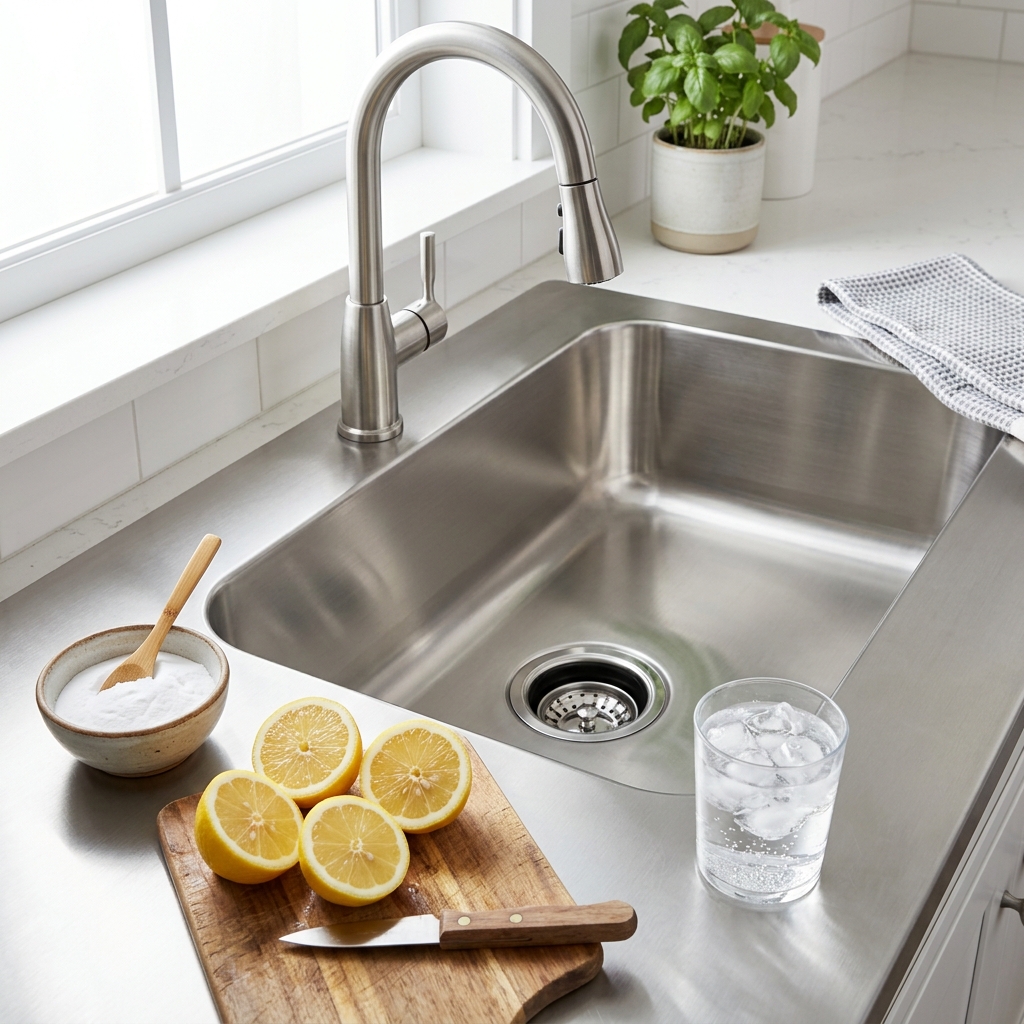
If your garbage disposal smells bad, the fastest way to deodorize and clean it naturally is by combining ice, kosher salt, baking soda, and lemon. First, pour 2 cups of ice cubes and 1 cup of kosher salt down the drain, then run the disposal with cold water to scrape off hardened food and grease. Next, pour 1/2 cup of baking soda followed by 1/2 cup of white vinegar to kill bacteria and dissolve remaining sludge. Finally, grind a lemon cut into quarters to leave a fresh, citrus scent. This entire clean garbage disposal baking soda lemon method takes less than 10 minutes and should be done monthly.
Knowing exactly how to clean a garbage disposal is an essential skill for any home cook. We’ve all been there: you walk into your kitchen ready to prepare a delicious meal, and you’re hit with an odor that smells like something died in your sink. You start looking around, checking the trash can, looking under the fridge, until you finally realize the truth: your garbage disposal smells bad. It’s a common problem, but it’s one that can quickly make your entire kitchen feel dirty and uninviting.
The truth is that garbage disposals are one of the most overworked and under-maintained appliances in our homes. We scrape plates, dump leftovers, and rinse all sorts of mysterious food particles down that dark hole, rarely thinking about where it all goes—or what gets left behind. Over time, those tiny food particles, sticky grease, and microscopic oils cling to the blades, the grinding chamber walls, and the dreaded splash guard. When these organic materials start to decompose in a dark, damp environment, they become a breeding ground for bacteria and mold. That’s why your garbage disposal smells bad.
But don’t panic! You don’t need expensive, harsh chemical cleaners to fix this. In fact, pouring bleach or caustic drain cleaners down your disposal can actually damage the delicate internal parts and rubber seals, leading to costly repairs. The most effective, safest, and most affordable way to restore freshness is to clean garbage disposal baking soda lemon style. By combining a few simple household ingredients, you can break down the grime, sanitize the chamber, and eliminate odors completely.
In this massive, exhaustive guide, we’re going to break down every single step of the ultimate garbage disposal cleaning routine. We’ll explore the science behind why the ice and salt method works, how the chemical reaction of baking soda and vinegar destroys bacteria, and why lemon is nature’s perfect degreaser. We’ll also cover crucial maintenance tips, like cleaning under the splash guard (the part everyone forgets), understanding the difference between InSinkErator and Waste King maintenance, and knowing what foods you should never put down the drain. Whether you’re dealing with a mild funk or a severe, gag-inducing stench, this guide will teach you exactly how to clean a smelly garbage disposal with lemon, ice and baking soda.
🧹 What You Need: Precise Measurements for Success
To get the best results, you need the right tools and exact proportions. Gather these supplies before you begin:
- 2 cups of standard ice cubes (crushed ice melts too fast)
- 1 cup of coarse kosher salt or rock salt (do not use fine table salt)
- 1/2 cup of pure baking soda (sodium bicarbonate)
- 1/2 cup of distilled white vinegar (5% acidity)
- 1 whole lemon, cut into small quarters (limes or oranges work too)
- 1 old toothbrush or specialized disposal cleaning brush
- 1 tablespoon of liquid dish soap (Dawn preferred for grease-cutting)
- 1 large pot of boiling water (approx. 4-6 quarts)
1. Why Do Garbage Disposals Smell So Bad?
Before we dive into the deep cleaning process, it’s vital to understand the root cause of the problem. If you don’t know why your garbage disposal smells bad, you won’t be able to prevent the odor from coming back. A garbage disposal is not a magical portal that vaporizes food; it is a mechanical grinder that uses centrifugal force to push food waste against a stationary grind ring. The teeth on this ring shred the food into particles small enough to pass through your plumbing system.
However, the grinding process is rarely 100% efficient. Several factors contribute to the buildup of foul-smelling residue:
1. Trapped Food Particles: As food is pulverized, tiny fragments can get lodged in the small crevices between the impellers (the moving blades) and the grind ring. Starchy foods, in particular, can turn into a glue-like paste that clings stubbornly to the metal surfaces. Over days and weeks, this trapped food begins to rot and ferment, producing pungent sulfur compounds.
2. Grease and Fat Buildup: Even if you are careful not to pour large amounts of cooking oil down the drain, small amounts of grease from sauces, dressings, and meats inevitably find their way in. When grease enters a cold environment (like a dark pipe), it solidifies. This hardened grease forms a sticky coating on the walls of the disposal chamber, trapping other food particles and creating a rancid, sour smell as the fats oxidize.
3. Bacterial Growth Under the Splash Guard: The rubber baffle (or splash guard) sits at the opening of the disposal to prevent food and water from shooting back up into the sink. While it serves a crucial function, its underside is a nightmare for cleanliness. The rubber folds collect a thick, slimy biofilm made of rotting food, mold, and bacteria. Because it’s hidden from view, it is frequently ignored during routine cleaning, making it the number one culprit when a garbage disposal smells bad.
2. Step One: The Physical Scrub (Ice and Salt Method)
Now that we know what we’re fighting, it’s time to attack the problem. The first phase of our deep clean focuses on physical abrasion. We need to physically dislodge the hardened grease and sticky food paste from the grinding ring and impellers. This is where the ice and salt method shines.
Why it works: Ice is hard enough to scrape the metal components without damaging them. As the ice is ground up, it creates a scouring action. The coarse kosher salt acts as a secondary abrasive, adding grit to scrub away the toughest grime. Additionally, the extreme cold of the ice causes any solidified fats and greases to become brittle, making it easier for the salt and ice shards to chip them away.
The Process:
- Ensure the disposal is turned off.
- Pour 2 cups of standard ice cubes directly into the disposal opening until it is relatively full.
- Pour 1 cup of coarse kosher salt or rock salt over the ice.
- Turn on the cold water faucet to a medium stream. Cold water is crucial here because it keeps the grease solid. Hot water would melt the grease, causing it to smear further down the pipes.
- Turn on the garbage disposal.
- Let the disposal grind the ice and salt mixture for about 30 to 45 seconds, or until you no longer hear the loud crunching sound of the ice.
- Leave the cold water running for another 15 seconds to flush the dislodged debris down the drain.
This step alone will significantly improve the situation, but to truly master how to clean a garbage disposal, we must address the bacteria.
3. Step Two: The Chemical Flush (Baking Soda & Vinegar)
With the physical debris removed, we need to sanitize the chamber and neutralize the odor-causing bacteria. This requires a chemical reaction. When you clean garbage disposal baking soda lemon style, the baking soda and vinegar step is the powerhouse of sanitization. Before you do this, you might also want to check our guide on how to clean a dishwasher with baking soda and vinegar to keep all your kitchen appliances fresh.
The Science: Baking soda (sodium bicarbonate) is a base, while white vinegar (acetic acid) is a mild acid. When they mix, they undergo an acid-base reaction that produces carbon dioxide gas. This creates a vigorous fizzing and bubbling action. This expanding foam reaches up into the nooks and crannies of the disposal chamber, lifting away microscopic grease particles and organic matter that the ice couldn’t reach. Baking soda also acts as a natural deodorizer, absorbing foul smells, while the acidity of the vinegar creates a hostile environment for bacterial growth.
The Process:
- Ensure the disposal is off and no water is running.
- Sprinkle 1/2 cup of pure baking soda directly into the disposal drain. Try to get it all the way down past the splash guard.
- Slowly pour 1/2 cup of distilled white vinegar over the baking soda.
- You will immediately hear and see a strong fizzing reaction. Place the sink stopper over the drain opening to force the expanding foam downwards into the disposal chamber rather than letting it escape up into the sink.
- Let the mixture sit and fizz for exactly 10 to 15 minutes. Do not rush this step; the chemical reaction needs time to break down the grime.
- While you wait, boil a large pot of water (about 4-6 quarts).
- Remove the stopper, turn on the disposal, and carefully pour the boiling water down the drain to flush out the loosened sludge and sanitize the system. (Warning: Pour carefully to avoid splashing scalding water).
4. Step Three: The Forgotten Zone (Cleaning the Splash Guard)
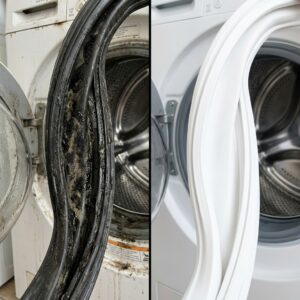
If your garbage disposal smells bad even after doing the ice and vinegar tricks, the culprit is almost certainly the splash guard (also known as the rubber baffle). This is the black rubber gasket with slits that sits right at the sink drain opening. Its job is to keep food from flying out, but the underside of this guard is the most disgusting part of your entire kitchen.
Because it is constantly exposed to wet food waste but never gets direct water pressure from the faucet, the underside of the splash guard develops a thick layer of black, smelly sludge composed of mold, bacteria, and rotting food. Cleaning this is non-negotiable.
The Process:
- Make absolutely sure the disposal switch is turned OFF. You may even want to unplug it or turn off the breaker for ultimate safety.
- Take an old, clean toothbrush (or a dedicated scrub brush) and dip it in warm, soapy water or pure white vinegar.
- Lift up one of the flaps of the rubber splash guard to expose the underside.
- Vigorously scrub the underside of the flap with the toothbrush. You will likely pull up a significant amount of dark, foul-smelling slime. Wipe the brush clean on a paper towel and repeat.
- Work your way around the entire circumference of the splash guard, lifting and scrubbing every single flap until the toothbrush comes back clean.
- Once finished, rinse the area thoroughly with hot water.
If the splash guard is removable (some models just pop out), remove it entirely and scrub it in the sink or run it through the top rack of the dishwasher.
5. Step Four: The Fresh Finish (The Lemon Method)
You’ve scrubbed the grime, sanitized the chamber, and cleaned the baffle. The final step in learning how to clean a garbage disposal is adding a natural, long-lasting fragrance. This is where the citrus comes in. While we use lemon in our clean garbage disposal baking soda lemon technique, you can also use oranges, limes, or even grapefruit peels.
Why it works: Citrus fruits contain d-limonene, a powerful natural solvent and degreaser found in the rinds. When the disposal grinds the lemon, it releases these essential oils, which cut through any remaining micro-layer of fat while simultaneously masking odors with a bright, clean scent. The citric acid in the juice also helps to remove hard water stains. Speaking of hard water and shine, don’t miss our tutorial on how to clean a stainless steel sink with baking soda for a complete kitchen sink makeover.
The Process:
- Take 1 whole lemon (even slightly old or dried out lemons work perfectly for this).
- Cut the lemon into small quarters or eighths. Do not put a whole half-lemon in the disposal at once, as the thick rind can temporarily jam the blades.
- Turn on the cold water to a medium flow.
- Turn on the disposal and drop the lemon pieces in one at a time.
- Let the disposal run until all the lemon is completely pulverized, then run the water for another 10 seconds to flush the pulp.
- Your sink will now smell incredibly fresh and clean.
⚠️ What Not to Do: The Top 5 Garbage Disposal Killers
To prevent your disposal from breaking down or developing horrific smells, NEVER put these items down the drain:
- 1. Grease, Fat, and Oil: Liquid grease will solidify in your pipes, creating massive clogs and trapping rotting food. Always pour grease into a jar or can and throw it in the trash.
- 2. Fibrous or Stringy Vegetables: Celery stalks, corn husks, artichoke leaves, and onion skins have tough fibers that can wrap around the impeller blades, causing the motor to jam and burn out.
- 3. Expandable Foods (Pasta and Rice): Pasta, rice, and oats expand when exposed to water. Even after grinding, they continue to swell in the pipes, creating a dense, glue-like paste that causes severe blockages and odors.
- 4. Hard Bones and Seafood Shells: While some high-end disposals claim they can handle bones, large beef or pork bones, and hard oyster or clam shells will dull the blades and severely strain the motor.
- 5. The Eggshell Myth: Some people claim eggshells sharpen the blades. This is a myth. Disposals don’t have sharp blades; they have blunt impellers. The membrane inside the eggshell can wrap around the grinding ring, and the granular shell powder can combine with grease to form a cement-like clog.
6. Alternative Methods and Advanced Cleaning Hacks
If you want to mix up your routine or try different techniques, here are a few advanced methods to keep in your arsenal when your garbage disposal smells bad.
The Dish Soap Cleaning Foam:
This is a great weekly maintenance trick. Put the sink stopper in the drain. Squirt 1 tablespoon of grease-cutting dish soap (like Dawn) into the sink and run the hot water until you have a few inches of sudsy water. Remove the stopper and turn on the disposal simultaneously. The suction will pull the soapy water down powerfully, washing the entire grinding chamber and flushing out the drain pipe with degreasing suds.
Frozen Vinegar Cubes:
Combine the abrasive power of ice with the antibacterial power of vinegar. Fill a dedicated ice cube tray with pure white vinegar (or a 50/50 mix of water and vinegar) and freeze them. Once a week, drop a handful of these vinegar cubes down the disposal and grind them with cold water. It scrapes and sanitizes in one easy step.
The Boiling Water Flush:
Sometimes, simplicity is key. Boiling water is one of the most effective ways to kill bacteria and dissolve minor grease buildup. Once a week, boil a large kettle of water. Turn on the disposal (without cold water running) and carefully pour the boiling water down the drain. This thermal shock is excellent for routine odor prevention.
🛡️ Maintenance & Prevention: Keeping the Odor Away
A clean garbage disposal baking soda lemon routine is just the beginning. Follow these habits to prevent smells from returning:
- Weekly Schedule: Run hot soapy water through the disposal or use the frozen vinegar cube trick once a week.
- Monthly Schedule: Perform the full Ice + Salt, Baking Soda + Vinegar, and Lemon deep clean once a month.
- Always Use Cold Water: Always run cold water while grinding food and for 15 seconds after the grinding is done. Cold water keeps fats solid so they can be chopped up and flushed away, rather than melting and coating the pipes.
- Run it Longer: Most people turn off the disposal the second the grinding noise stops. Leave it running with water for an extra 10-15 seconds to ensure all particles are fully flushed out of the chamber and into the main plumbing line.
- Cut Food Smaller: Don’t shove entire rotting vegetables or huge chunks of meat down the drain. Chop large items into smaller pieces to reduce the strain on the motor and ensure a finer grind.
7. Troubleshooting: Reset Buttons, Brands, and Plumbing Problems
Sometimes, the issue goes beyond just a bad smell. You need to know how to handle mechanical issues and when to call a professional.
The Reset Button (Overload Protector):
If you turn on your disposal and hear absolutely nothing (no hum, no grinding), the motor has likely tripped the internal breaker to prevent overheating. Look under your sink at the bottom of the disposal unit. You will see a small, usually red, square button. This is the reset button. Press it firmly until it clicks, then try turning the disposal on again. If it trips immediately, you may have a severe jam or a failing motor.
Unjamming the Blades:
If you turn on the unit and hear a humming noise but the blades aren’t spinning, DO NOT leave it on, as it will burn out the motor. Turn it off immediately. Look for a small hexagonal hole in the center of the bottom of the unit. Insert an Allen wrench (most disposals come with one, or use a standard 1/4 inch hex wrench) into this hole and crank it back and forth manually to physically free the jammed impellers. Once it moves freely, press the reset button and try again.
InSinkErator vs Waste King Maintenance:
The two most popular brands, InSinkErator and Waste King, have slightly different maintenance profiles. InSinkErator models often feature multi-stage grinding and exceptionally quiet operation, but their intricate grinding chambers can sometimes trap more micro-particles, requiring strict adherence to the monthly baking soda and vinegar flush. Waste King models typically have higher-speed permanent magnet motors that violently pulverize food, which can sometimes result in less buildup, but they are generally louder and have a more basic internal structure. Regardless of the brand, the cleaning methods outlined in this guide apply universally.
When the Smell Means a Plumbing Problem:
If you have diligently cleaned the disposal, scrubbed the splash guard, and used copious amounts of lemon and baking soda, yet your garbage disposal smells bad (specifically a sewage or rotten egg smell), the problem may not be the disposal at all. It could be a failure in your sink’s P-trap (the curved pipe under the sink). The P-trap holds a small amount of water to block sewer gases from rising into your home. If this trap is dry, leaking, or if the venting pipe is clogged, sewer gas will escape into your kitchen. In this scenario, no amount of lemon will fix the issue—you need to check your plumbing or call a plumber.
DIY vs Calling a Plumber Cost:
Cleaning your disposal yourself using the methods in this guide costs less than $3 in materials (ice, salt, vinegar, baking soda, lemon). If your disposal is jammed and you can fix it with an Allen wrench, it’s free. However, if you ignore maintenance and the motor burns out, or if you develop a massive grease clog deep in your pipes, a professional plumber will charge anywhere from $150 to $300 just to clear the line, and upwards of $400 to install a brand new disposal unit. Regular maintenance is financially essential.
❓ Frequently Asked Questions
Is it safe to put boiling water down a garbage disposal?
Yes, it is safe and highly recommended for cleaning purposes. Boiling water helps dissolve grease buildup and kills bacteria in the disposal chamber. However, you should only pour boiling water down the drain when the disposal is NOT grinding food. When grinding food, always use cold water to keep fats solid.
Can I use bleach to clean my garbage disposal?
No, you should never use pure bleach. Bleach is highly corrosive and can degrade the rubber seals, gaskets, and splash guard inside the unit, leading to leaks and premature failure. It can also cause the metal grinding components to rust. Stick to natural cleaners like the clean garbage disposal baking soda lemon method.
Why does my garbage disposal smell like sewage?
A sewage smell usually indicates one of two things: either there is a massive amount of rotting, decaying meat or organic matter trapped under the splash guard, or you have a plumbing issue where sewer gases are escaping past a dry or faulty P-trap under the sink. Clean the splash guard first; if the smell persists, consult a plumber.
Do eggshells sharpen garbage disposal blades?
This is a persistent myth. Garbage disposals do not have sharp blades; they use blunt impellers to smash food against a grind ring. Eggshells do nothing to sharpen them. In fact, the membrane of the egg can tangle the impellers, and the ground-up shell can combine with grease to form severe clogs. Throw eggshells in the compost or trash.
Are coffee grounds good for a garbage disposal?
While they might smell nice initially, coffee grounds are terrible for your plumbing. They form a dense, heavy sludge that settles at the bottom of your pipes, catching grease and causing massive blockages over time. Always dispose of coffee grounds in the trash or compost.
How often should I clean my garbage disposal?
For optimal performance and odor control, you should perform a light cleaning (like flushing with soapy water) once a week, and a deep cleaning (ice, salt, baking soda, vinegar, lemon) once a month. If you notice a smell developing sooner, clean it immediately.
Maintaining a fresh, odor-free kitchen is entirely within your control. You don’t need harsh chemicals, and you don’t need to fear the dark depths of your sink drain. By understanding the mechanical reality of how these devices operate, and by respecting the chemistry of simple household ingredients, you can extend the life of your appliance and eliminate odors at the source. The next time you walk into your kitchen and notice that distinct, unpleasant smell, you won’t panic. You will simply grab your ice, salt, baking soda, vinegar, and a lemon, and handle the problem in ten minutes flat. Consistency is the true secret to a pristine kitchen. So set a reminder on your phone, stick to a monthly deep-cleaning schedule, and enjoy a fresher, cleaner home.
✅ The Bottom Line
Figuring out how to clean a garbage disposal doesn’t have to be complicated. When your garbage disposal smells bad, it’s usually due to trapped food, grease, and bacteria hiding under the splash guard. By employing a three-step attack—using ice and salt for physical abrasion, baking soda and vinegar for chemical sanitization, and lemon for a degreasing, fresh finish—you can restore your disposal to a like-new state. Remember to scrub the underside of the rubber baffle, never put fibrous foods or grease down the drain, and stick to a monthly maintenance routine. This simple clean garbage disposal baking soda lemon strategy will save you money on plumbers and keep your kitchen smelling beautiful all year round.
8. The Chemistry of Deodorization: Why These Ingredients Work
To truly appreciate the clean garbage disposal baking soda lemon method, we need to dive deeper into the chemistry of why these common household items are so incredibly effective at combating intense odors. When your garbage disposal smells bad, it is usually releasing volatile sulfur compounds (VSCs) and amines, which are the byproducts of bacterial metabolism as they break down proteins in meat and dairy residue.
The Role of Sodium Bicarbonate (Baking Soda): Baking soda is amphoteric, meaning it can react with both acids and bases. Most foul odors in the kitchen are either strongly acidic (like sour milk or rancid fats) or strongly basic (like rotting fish). Baking soda neutralizes these pH extremes, converting the volatile, smelly molecules into non-volatile sodium salts, which have no odor. This is why baking soda doesn’t just mask the smell; it chemically alters the odor molecules so they can no longer be detected by your nose.
The Role of Acetic Acid (White Vinegar): Vinegar is a mild organic acid with a pH of around 2.5. This high acidity creates an environment where most odor-causing bacteria and mold spores simply cannot survive. When applied to the slime in your disposal, the acetic acid disrupts the cellular structure of the bacteria, effectively neutralizing them. Furthermore, vinegar is excellent at dissolving mineral deposits from hard water, which can otherwise create rough patches on the metal components where food particles tend to cling.
The Power of D-Limonene (Lemon Peel): While the juice of the lemon provides extra acidity, the real magic lies in the peel. Lemon rinds contain a high concentration of d-limonene, a naturally occurring terpene. D-limonene is a potent solvent, meaning it has the ability to break down oils and fats. Industrial degreasers often use synthesized limonene for this exact reason. When you grind the lemon quarters in the disposal, you are essentially extracting this natural degreaser in real-time, allowing it to coat the internal components and break down the thin, stubborn layer of grease that the ice and vinegar might have missed. Plus, it leaves behind a highly pleasant, natural citrus aroma that signifies a truly clean environment.
9. Environmental and Septic System Considerations
Another massive advantage of learning how to clean a garbage disposal with natural methods is the benefit to the environment and your home’s wastewater system. If your home relies on a septic tank, what you put down the drain is of critical importance. Septic systems rely on a delicate balance of beneficial bacteria to break down solid waste. Pouring bleach, harsh chemical drain cleaners, or antibacterial soaps down the disposal can wipe out this beneficial bacteria, leading to a catastrophic failure of the septic system, backups, and repairs that can cost tens of thousands of dollars.
The ice, salt, baking soda, vinegar, and lemon method is 100% septic-safe. In fact, baking soda can actually help buffer the pH of the septic tank, promoting a healthy environment for the necessary bacteria to thrive. The small amounts of vinegar are quickly diluted and neutralized by the alkaline environment of wastewater, posing no threat to the microbial balance.
Furthermore, by avoiding chemical cleaners, you are preventing toxic substances from entering municipal water treatment facilities and, ultimately, local waterways. Phosphorus and harsh caustic chemicals found in commercial drain cleaners are notorious pollutants. By relying on pantry staples for your cleaning needs, you are adopting a greener, more sustainable approach to home maintenance that is safe for your family, your pets, and the planet.
10. Comprehensive Guide to Odor Identification
Identifying the specific type of odor coming from your sink can actually help you pinpoint the exact cause and the best targeted solution. Not all bad smells are created equal. Here is a breakdown of common disposal odors and what they mean:
The Sour Milk or Vomit Smell: This is typically caused by dairy products or high-protein foods that have spoiled in the grinding chamber. Bacteria breaking down these proteins release butyric acid, which is responsible for that distinct rancid odor. The best solution here is a heavy application of the baking soda and vinegar flush, as the acid-base reaction is excellent at neutralizing butyric acid.
The Rotten Egg or Sulfur Smell: This indicates the presence of hydrogen sulfide, a gas produced by anaerobic bacteria (bacteria that thrive in oxygen-deprived environments). These bacteria typically live in the dense, sludgy biofilm on the underside of the rubber splash guard or deep in the P-trap. If you smell sulfur, you must aggressively scrub the splash guard with a toothbrush. If the smell persists, it might be sewer gas, requiring a check of your plumbing vents and P-trap.
The Musty or Earthy Smell: A musty smell usually indicates mold or mildew growth. This happens when the disposal is not used frequently, allowing damp organic matter to sit undisturbed for long periods. To combat mold, the vinegar and ice cube method is highly effective, as the continuous cold and acidity will destroy the mold spores and scrape away the growth.
The Dead Animal Smell: As horrifying as it sounds, this smell usually results from a large piece of rotting meat or poultry fat that has become lodged around the impeller blades. This requires physical removal. You may need to use a flashlight and long tongs to retrieve the decaying matter before performing a full deep clean with ice, salt, baking soda, vinegar, and lemon.
By becoming a connoisseur of these unpleasant odors, you can respond more effectively, ensuring that when your garbage disposal smells bad, you know exactly which phase of the cleaning process to prioritize.
11. The Anatomy of a Garbage Disposal
Understanding the anatomy of your appliance is crucial for maintaining it properly. Many homeowners assume the disposal has sharp, spinning blades like a blender. This fundamental misunderstanding leads to improper use and cleaning. Let’s break down the actual components of a standard garbage disposal to demystify its operation.
The Splash Guard (Baffle): As mentioned earlier, this is the rubber seal at the sink opening. It serves two purposes: preventing food and water from splashing back up during operation, and muffling the noise of the grinding process. It is the number one harbor for bacteria.
The Hopper Chamber: This is the upper cylindrical chamber where food waste first drops. It is usually made of plastic or galvanized steel. Grease can easily coat the walls of the hopper, which is why the expanding foam of baking soda and vinegar is necessary to reach these upper vertical surfaces.
The Flywheel and Impellers: At the bottom of the hopper is a spinning metal plate called the flywheel. Attached to the edges of the flywheel are two heavy metal lugs called impellers. These impellers are blunt, not sharp. They do not slice food; they act like hammers, smashing the food outward against the walls using centrifugal force.
The Grind Ring: Surrounding the flywheel is a stationary metal ring with sharp teeth or grooves. As the impellers smash the food against this ring, the food is pulverized and forced through the small gaps in the ring.
The Drain Chamber: Once the food particles are small enough to pass through the grind ring, they drop into the lower drain chamber, where running water flushes them out of the disposal unit and into your home’s wastewater plumbing.
By visualizing this process, you can understand why fibrous foods like celery tangle the impellers, why grease coats the hopper chamber, and why the physical scraping action of ice and salt is necessary to clear the grind ring. This knowledge empowers you to maintain the unit effectively and troubleshoot issues before they escalate.
12. Long-Term Strategies for a Pristine Kitchen Sink
The journey to a clean, odor-free kitchen doesn’t end with a single deep cleaning session. It requires a holistic approach to kitchen hygiene and a commitment to daily best practices. When you integrate the principles of the clean garbage disposal baking soda lemon method into your broader household routine, you elevate the standard of cleanliness in your entire home.
Consider the relationship between your garbage disposal and the rest of your kitchen plumbing. The disposal is often the first point of entry for organic waste, but that waste must travel through feet or even yards of piping before it leaves your home. By keeping the disposal impeccably clean, you are also protecting the downstream plumbing from clogs, backups, and slow drains. A clean disposal means a cleaner pipe network, which translates to fewer plumbing emergencies and a longer lifespan for your home’s infrastructure.
Furthermore, the habit of regular maintenance instills a sense of pride and mindfulness in your kitchen environment. When you know exactly how to clean a garbage disposal and you execute that knowledge consistently, you are less likely to fall into bad habits like pouring grease down the drain or ignoring minor odors. You become proactive rather than reactive, addressing small issues before they snowball into major, costly repairs.
In conclusion, a smelly garbage disposal is not a life sentence. It is simply a sign that the appliance needs attention, care, and a bit of basic chemistry. Armed with ice, kosher salt, baking soda, white vinegar, and a fresh lemon, you possess everything you need to conquer even the most stubborn kitchen odors. Remember the steps: scrape away the grime with ice and salt, sanitize the chamber with the bubbling power of baking soda and vinegar, scrub the neglected splash guard, and finish with the natural degreasing strength of lemon. Share this knowledge with your family members to ensure everyone respects the disposal’s limitations, and you will enjoy a fresh, hygienic, and perfectly functioning kitchen sink for years to come. Never again will you have to wonder why your garbage disposal smells bad; instead, you will confidently take action, knowing that the ultimate solution is always right there in your pantry.