
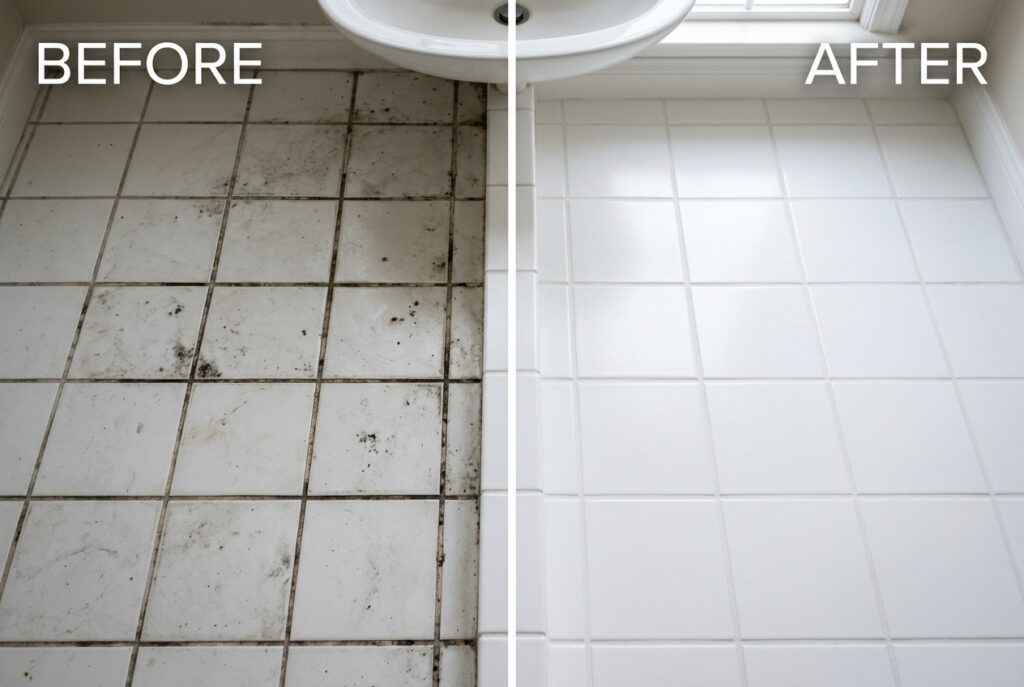
Heavy-Duty Tile and Grout Whitening Scrub Paste Summary
Preparation Time: 5 Minutes | Estimated Cost: Under $2.00
Ingredients List
- 3/4 cup Baking Soda
- 1/4 cup 3% Hydrogen Peroxide
- 1 tablespoon Clear Dish Soap
Step-by-Step Instructions
- Mix baking soda, hydrogen peroxide, and dish soap in a bowl to form a thick paste.
- Apply paste along grout lines or soap scum areas.
- Allow the paste to sit for 15 minutes while the bubbling oxygen action works.
- Scrub lightly with a soft brush, then rinse clean with warm water.
If you look closely at your tile floors or shower walls, you might notice the grout isn’t quite the color it used to be. Because grout is naturally porous, it acts like a sponge, absorbing everyday dirt, spills, hard water minerals, and even mold over time. Once this grime settles deep into the grout lines, no amount of regular mopping will make it look clean again.
Many people turn to liquid spray cleaners, but they often drip off vertical surfaces or evaporate too quickly to break down tough stains. That is exactly why a heavy-duty scrub paste works so much better. A paste clings directly to the grout, providing the necessary dwell time for the cleaning agents to penetrate the pores and lift the deeply embedded dirt. It also adds a mild abrasive action that scrubs away stubborn stains without scratching your tiles. This heavy-duty tile and grout whitening scrub paste will completely transform your floors and showers, bringing back that crisp, bright look you have been missing.
🧹 What You Need
- Baking Soda: This provides a gentle, natural abrasive action that helps lift dirt out of the porous grout without scratching your tile.
- Hydrogen Peroxide (3%): A fantastic whitening agent and natural alternative to bleach that breaks down organic stains and kills mold spores.
- Dish Soap: Just a few drops will help cut through grease and soap scum, binding the paste together.
- Grout Brush: A stiff-bristled brush designed specifically for grout lines. (Pro tip: I highly recommend this heavy-duty grout brush for the best results without wearing out your arms.)
- Microfiber Cloth: For wiping away the paste and residue once you are finished scrubbing.
- Small Mixing Bowl: To combine your ingredients into a thick paste.
Stubborn Mold Solution Recommendation
If mold won’t leave your tile or grout alone no matter what you try, here is what neat homeowners use directly from Amazon to clear deep mold roots effortlessly:
Step-by-Step Instructions
Step 1: Mix the Paste
In your small bowl, combine 3/4 cup of baking soda with 1/4 cup of hydrogen peroxide. Add 1 tablespoon of clear liquid dish soap. Stir the mixture slowly until it forms a thick, spreadable paste. If it is too runny, add a little more baking soda. If it is too thick, splash in a few more drops of hydrogen peroxide. You want a consistency similar to frosting so it sticks to the grout lines without running everywhere.
Step 2: Apply to the Grout
Scoop a generous amount of the paste onto your grout lines. You can use an old spoon or a gloved finger to smear it directly over the discolored areas. Make sure the grout is completely covered by a thick layer of the mixture. Do not spread it too thin, as the paste needs volume to remain moist and active.
Step 3: Let it Dwell
This is the most crucial step that people often skip. Let the paste sit on the grout for at least 15 minutes. The hydrogen peroxide needs this dwell time to react with the organic stains and bleach them out safely. If you scrub immediately, you are doing all the hard work instead of letting the ingredients work for you.
Step 4: Scrub the Grout Lines
Once the dwell time is up, grab your grout brush and scrub the lines firmly. Work in short, vigorous back-and-forth motions. You will see the foam turn brown or grey as it pulls the deeply embedded dirt out of the pores. The baking soda acts as a mild abrasive to physically dislodge the grime that the hydrogen peroxide loosened up.
Step 5: Wipe and Rinse
Use a damp microfiber cloth to wipe away the dirty paste. You may need to rinse your cloth in warm water a few times to get all the gritty baking soda residue off the floor. Finally, give the area a quick mop or wipe down with plain warm water to ensure absolutely no film is left behind.
⚠️ What Not to Do
- Do not use metal brushes: Never use steel wool or wire brushes on your grout. They will scratch your tiles and can permanently gouge or chip away the grout itself.
- Avoid bleach on colored grout: Chlorine bleach can permanently discolor or fade tinted grout. Even on white grout, overuse of bleach can cause it to become brittle and crumble over time.
- Don’t mix vinegar and peroxide: Never mix vinegar into this hydrogen peroxide paste in the same container, as it creates peracetic acid, which can be harsh and irritating.
How to Keep Grout White After Cleaning
Once you have put in the effort to whiten your grout, you want those results to last as long as possible. The most important maintenance step is applying a high-quality penetrating grout sealer. Wait 24 hours after cleaning to ensure the grout is bone dry, then apply the sealer according to the package directions. This fills the microscopic pores and creates a protective barrier against future stains.
For regular maintenance, stick to pH-neutral floor cleaners. Highly acidic cleaners (like straight vinegar) or harsh alkaline cleaners can degrade the grout and strip away your sealer over time. In the bathroom, squeegee shower walls after every use to prevent water and soap scum from sitting on the grout lines, and ensure good ventilation to keep mold at bay.