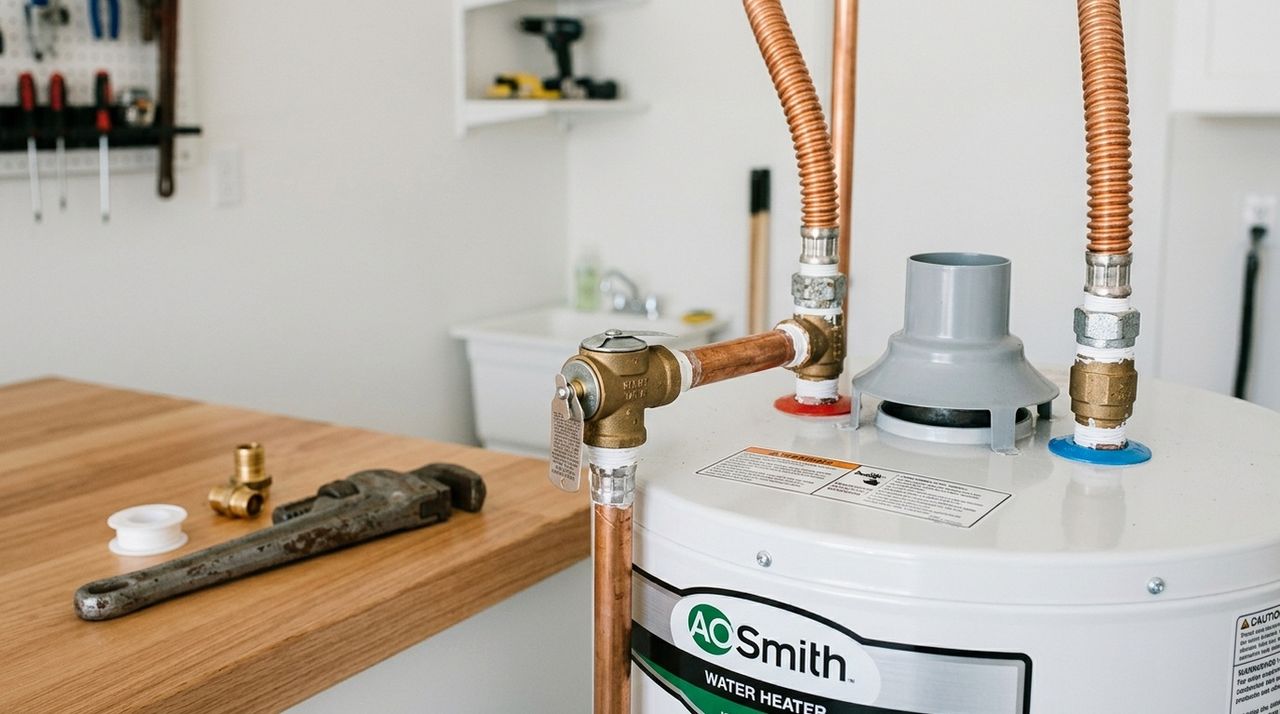
Finding a puddle of water sitting in the recessed top jacket of your water heater triggers instant panic for any homeowner. The immediate fear is catastrophic internal tank failure, flooding, and an unexpected $1,800 to $2,500 emergency water heater replacement. But here is the laboratory reality: over 75% of water heater leaks originating from the top are completely external and repairable in under an hour for less than $35 in hardware store parts.
When water pools atop a tank, it almost always stems from one of four serviceable junction points: galvanic corrosion at the dielectric nipples, weeping rubber gaskets inside braided flex lines, an over-pressurized Temperature and Pressure Relief (TPR) valve discharge thread, or a loose cold-water shutoff ball valve. In this comprehensive diagnostic masterclass, we detail the exact metallurgical inspection steps, pressure-relief protocols, and plumbing techniques required to permanently resolve top water heater leaks while saving $600 in emergency contractor callout fees.
ud83dudcb0 Contractor Price Reality Check: Top Water Heater Leak Repair
| Repair Component | Licensed Plumber Fee | DIY TidyUp Daily Method | Your Net Savings |
|---|---|---|---|
| Emergency Diagnosis & Trip Fee | $175 – $250 | $0.00 (Flashlight & Tissue) | Save $200 |
| Dielectric Nipple Replacement (Pair) | $320 – $450 | $18.50 (OEM NPT Nipples) | Save $380 |
| Braided Stainless Flex Lines Replacement | $240 – $320 | $26.00 (Lead-Free Flex Lines) | Save $250 |
| Total Typical Project Cost | $595 – $770 | $34.50 | Save $620+ (88% Saved) |
The 4 Root Causes of Water Pooling on Top of the Heater
Before touching a pipe wrench, you must identify the precise origin of moisture. Water is insidious: capillary action and gravity cause pinhole mists to travel along copper pipes and settle into the stamped circular depression surrounding the inlet and outlet ports. Use a clean dry white paper towel to dab each connection.
1. Galvanic Corrosion at the Dielectric Nipples (Cause #1)
Modern water heater tanks are constructed of heavy-gauge carbon steel lined with vitreous porcelain enamel. Your home’s supply lines, however, are almost certainly copper. When dissimilar metals (steel and copper) come into direct physical contact in the presence of conductive water (an electrolyte), an electrochemical battery is created. Electrons naturally migrate from the more active anode (the steel tank fittings) to the cathode (the copper piping), chemically consuming the iron threads.
Manufacturers install dielectric nipplesu2014steel pipe nipples lined with an internal thermoplastic (polypropylene) sleeveu2014to electrically isolate copper from steel. Over 6 to 10 years of continuous thermal cycling, this internal polymer barrier can degrade or crack. Once breached, galvanic corrosion rapidly eats the male pipe threads from the inside out, weeping rust-tinted water that puddles into the top ring of the tank.
2. Degraded Flex Line Rubber Washers
Most residential code installations mandate flexible braided stainless steel or corrugated copper connectors between rigid overhead supply pipes and the tank. Inside the female swivel nuts of these connectors sit EDPM rubber or Santoprene compression washers. Continuous 140°F water temperature, chlorine, and chloramines in municipal tap water gradually harden and embrittle these rubber seals, leading to micro-seepage at the swivel crimp that drips down onto the tank lid.
3. Temperature & Pressure Relief (TPR) Valve Weeping
Every residential water heater is equipped with a spring-loaded brass safety valve calibrated to trip at either 210°F or 150 PSI. If your TPR valve is top-mounted (common on many modern models), mineral scale or excessive municipal thermal expansion will cause the brass seat to leak a slow trickle. If this discharge pipe is not routed down to within 6 inches of the floor, the water pools around the mounting bung.
4. Cold Water Inlet Ball Valve Stem Seal
Directly above the heater on the cold supply line sits the emergency shutoff valve. Older multi-turn gate valves with packing nuts or cheaper quarter-turn ball valves frequently experience packing gland weeping when adjusted. The drip runs down the vertical copper drop tube directly onto the tank roof.
Required Tools, Parts & Consumables
- Pair of 3/4″ NPT Dielectric Water Heater Nipples
- Two 3/4″ FIP x 3/4″ FIP Stainless Braided Flex Lines
- High-Density PTFE Plumbing Thread Tape (Water Rated)
- TFE-Paste Pipe Joint Thread Sealant
- 10-Inch Pipe Wrench + 12-Inch Pipe Wrench (Opposing)
- 10-Inch Adjustable Crescent Wrench
- Digital Non-Contact Voltage Tester & Multimeter
- Clean Drain Bucket & Microfiber Shop Towels
Save $4,000+ in Unnecessary Contractor & Emergency Service Calls
Don’t let contractors charge you $500 for a 15-minute diagnostic. Master verified step-by-step repair decision trees, non-toxic formulations, and seasonal appliance protection in the complete field manual by Yolo Fisher.
Step-by-Step Diagnostic & Repair Protocol
Electrical / Gas & Water Supply Isolation
Never service pressurized or energized plumbing. If you have an electric water heater, locate your main breaker panel and switch OFF the dedicated 240V double-pole 30-amp circuit breaker. Verify zero voltage using a non-contact electrical tester on the upper thermostat access cover. For gas water heaters, rotate the gas control thermostat dial to the “PILOT” position. Next, turn the cold-water inlet valve handle directly above the heater clockwise until fully closed to stop incoming municipal pressure.
Pressure Depressurization & Tank Top Inspection
With the cold supply valve off, go upstairs and turn ON the hot water tap on any bathroom sink. This breaks internal tank vacuum and drains high-pressure head water out of the vertical risers. Let water run until flow completely stops. At the water heater, thoroughly dry the top jacket using clean microfiber towels. Use a bright LED work light to inspect the threaded base of both dielectric nipples where they enter the tank’s spud bungs. Look for green copper sulfate efflorescence or reddish-brown iron oxide crust.
TPR Valve & Discharge Pipe Diagnostic
If the dielectric nipples are bone-dry, shift attention to the Temperature and Pressure Relief (TPR) valve. Place a bucket underneath the bottom of the 3/4″ copper discharge tube. Gently lift the silver test lever slightly to flush any calcium particulate off the rubber valve seat, then let it snap shut. If water continually seeps from the top threads of the valve bung, the valve must be unthreaded and resealed or replaced with a new 150 PSI / 210°F rated relief valve ($18 at any plumbing supply).
Corroded Nipple Removal & Thread Dressing
Disconnect the flex line nuts using an adjustable wrench. To extract a corroded dielectric nipple without damaging the water heater tank’s internal welded spud, always employ the two-wrench counter-torque technique. Place one 10-inch pipe wrench on the tank spud collar to hold it rigid, and lock a 12-inch pipe wrench onto the center hexagonal or circular body of the nipple. Apply steady, counter-clockwise leverage to break the rusty seal. Once removed, inspect the female threads inside the tank spud. Use a small wire brush to clean out loose oxidation.
Install Dielectric Unions & System Pressure Test
Take your new 3/4-inch dielectric nipples. Wrap the male threads clockwise with 4 to 5 tight layers of high-density PTFE plumbing tape, followed by a smooth wipe of Teflon-paste pipe compound over the tape. This dual-seal method guarantees leak-proof performance under severe thermal contraction. Thread the nipples into the tank by hand, then tighten with a pipe wrench until snug (approx. 2 to 3 full turns past hand-tight). Reconnect your stainless braided flex lines (hand-tight plus 1/4 turn with a wrenchu2014do NOT over-torque rubber compression gaskets).
Slowly open the cold water supply valve. Keep the upstairs hot faucet open until cold water gushes in a solid, air-free stream, confirming the tank is 100% full. Once purged, close the faucet and inspect all fittings with a dry tissue. If zero moisture appears after 30 minutes under full municipal pressure, restore electric breaker power or rotate gas control back to ON.
u26a0ufe0f Critical Warning: Dry-Fire Destruction
Never restore electrical power to an electric water heater until the tank has been completely purged of air and is 100% filled with water. If an electric heating element is energized in air for even 10 seconds, the dry element sheath reaches 1,200°F and burns out instantly (“dry-fire”), necessitating element replacement.
Frequently Asked Questions About Top Water Heater Leaks
Can a leaking dielectric nipple be fixed with plumbers tape without replacement?
No. Once galvanic corrosion breaches the thermoplastic lining of a dielectric nipple, iron oxide dissolves the male threads. The nipple must be unscrewed and replaced with a new dielectric union to prevent rapid tank rust-through.
Why does water pool on top of my water heater only during heating cycles?
Thermal expansion in closed plumbing systems without an expansion tank forces pressure past 150 PSI during heating cycles, causing the TPR valve to seep relief discharge onto the tank top.
How much does a plumber charge to fix a top water heater leak vs DIY?
Plumber service callouts to diagnose and replace dielectric nipples or flex lines range from $450 to $700. Performing the diagnostic and repair yourself costs under $35 in parts and takes 45 minutes.