Quick Answer
To eliminate washing machine odors naturally, clean the rubber gasket and detergent dispenser with white vinegar. Then, run an empty hot water cycle with 1/2 cup of baking soda, followed by a separate empty hot cycle with 2 cups of white vinegar. Always leave the door open between washes to prevent mold.
Banishing Musty Odors for Good
It seems counterintuitive, but the machine that is solely responsible for cleaning your clothes can often become the absolute worst source of a foul odor in your home. High-efficiency front-loading washing machines are particularly prone to developing musty, mildew smells due to their airtight seals that are specifically designed to trap moisture inside. Over time, residual laundry detergent, excessive fabric softener, and general dirt build up in the hidden crevices of the drum and rubber gaskets. This creates the perfect, warm, damp environment for bacteria and mold to thrive.
Ignoring a smelly washing machine isn’t just a matter of putting up with a bad scent in your laundry room. It can lead to those stubborn odors transferring directly to your freshly laundered clothes. There is nothing worse than taking a warm load of laundry out of the machine only to realize it smells like a damp basement. Fortunately, you can thoroughly clean and deodorize your machine using natural ingredients you probably already have in your pantry: white vinegar and baking soda. These household staples effectively neutralize odors, break down residue, and eliminate mold without the need for harsh, expensive chemical cleaners.
This comprehensive guide will walk you through a simple, highly effective natural process to refresh your washing machine. Regular maintenance using this exact method will ensure your appliance not only smells clean but also continues to wash your clothes at peak efficiency for years to come.
Why Your Washing Machine Smells: The Science
To truly understand how to fix a smelly washing machine, it is helpful to know exactly why the odors are developing in the first place. The unpleasant scent is rarely a sign that your machine is completely broken; rather, it is a biological reaction happening inside the drum.
Modern washing machines use significantly less water than older models. While this is fantastic for the environment and your water bill, it means that less water is flushing out the dirt, body oils, and soap residue after each cycle. This leftover residue is essentially a food source for bacteria and mold. When you shut the door of the washing machine, you are sealing in moisture. This combination of moisture, darkness, warmth, and a food source allows microbial colonies to explode in population.
Furthermore, liquid fabric softeners contain animal fats and other heavy binding agents that are notoriously difficult to wash away completely. These sticky substances cling to the outer tub (which you cannot see) and the drain pump, creating a sludge often referred to as “scrud.” Scrud emits a highly sulfurous, rotten-egg or mildew-like scent as the organic material within it begins to decay. Breaking down this scrud is the key to permanently banishing the smell, which is exactly why the acidic nature of vinegar combined with the mild abrasive properties of baking soda is so incredibly effective.
Top-Loading vs Front-Loading: Key Differences
While both types of washing machines can develop odors, the underlying causes and the areas that require the most attention differ significantly based on the design.
Front-Loading Machines: These are notorious for odor issues primarily because of the large rubber gasket around the door. This gasket is necessary to prevent water from pouring out onto your floor, but its folds and crevices trap standing water, lint, and detergent. Additionally, the horizontal orientation of the drum means that water doesn’t drain as completely by gravity alone compared to a vertical drum. If you own a front-loader, the rubber seal must be your primary focus during deep cleaning.
Top-Loading Machines: Standard top-loaders are less prone to mold because water drains straight down, and the top lid doesn’t usually create an airtight seal. However, high-efficiency (HE) top-loaders use less water and can suffer from the same residue buildup as front-loaders. In top-loaders, odors often originate from the lint trap (if equipped), the agitator (if it has a hollow center), and the space between the inner and outer tubs. While the cleaning principles remain the same, top-loaders require filling the tub fully with hot water to ensure the cleaning agents reach the high-water mark where scum tends to accumulate.
🧹 What You Need
- White vinegar (about 2 cups, distilled is best)
- Baking soda (about 1/2 cup, fresh)
- A clean microfiber cloth (highly absorbent)
- An old toothbrush (for scrubbing tight corners)
- Warm water (for rinsing components)
Step-by-Step Instructions
Step 1: Deep Clean the Rubber Seal
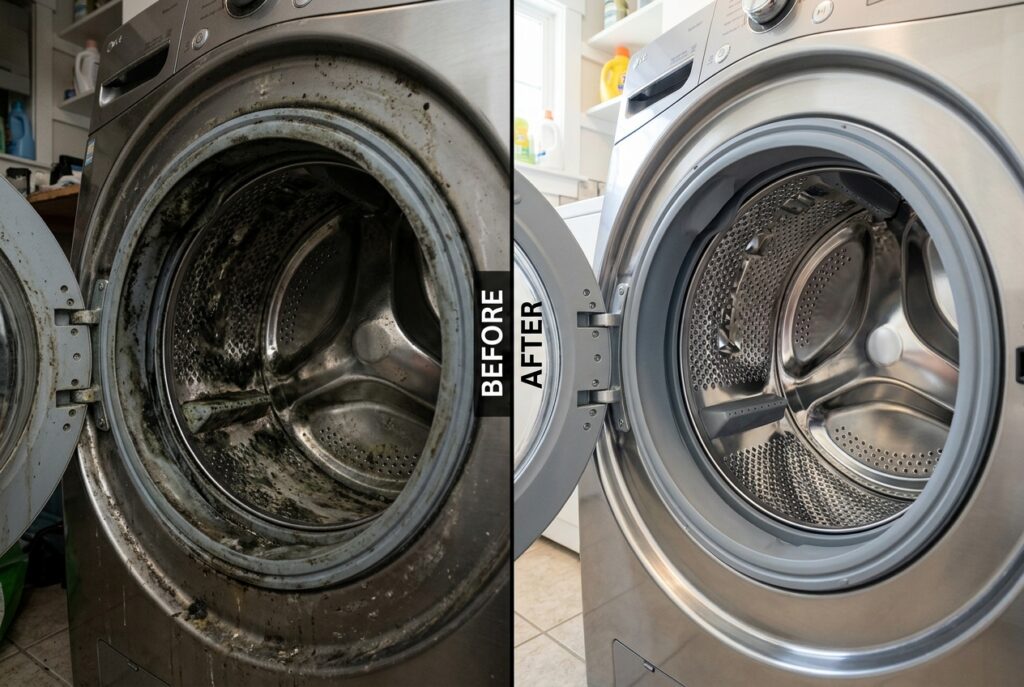
The first and arguably most important step is tackling the rubber gasket around the door, which is the most common hiding spot for black mold, mildew, and trapped grime. This area holds stagnant water after every single wash. Pull back the thick folds of the seal gently but firmly. You might be shocked at the amount of slime, hair, and lint trapped inside.
Wipe the inside thoroughly with a microfiber cloth heavily dampened with straight white vinegar. The acidity of the vinegar will immediately begin breaking down the mold spores and soap scum. Do not dilute the vinegar for this step; you want its full strength to tackle the stubborn residue.
For areas where mold has taken a strong hold or in the tightest grooves where the cloth cannot reach, use an old toothbrush. Dip the toothbrush in vinegar and scrub vigorously. Be careful not to scrub so hard that you tear the rubber, but apply enough pressure to dislodge the grime. Once clean, wipe the entire seal down with a fresh, dry cloth.
Step 2: Sanitize the Dispenser Drawer
The detergent and fabric softener dispenser drawer is another prime location for mold growth. Because fabric softener is thick and sticky, it rarely washes out entirely, leaving a film that mold loves to feed on. Remove the drawer completely from the machine. Most modern machines have a small lever or release button hidden inside the drawer housing that allows it to slide out fully.
Take the drawer to your sink and soak it in hot water mixed with a generous splash of vinegar. Allow it to sit for at least 15 minutes to loosen the calcified detergent and sticky fabric softener. Then, use your toothbrush to scrub every compartment, paying special attention to the siphon tubes and corners.
Before putting the drawer back, take your vinegar-dampened microfiber cloth and reach inside the cavity where the drawer sits in the machine. Wipe the ceiling and sides of this cavity, as mold frequently grows here due to the moisture evaporating from the drawer. Only reinsert the drawer once both the drawer and the cavity are completely clean and dry.
Step 3: Run the Baking Soda Cycle
Now it is time to tackle the interior of the drum and the hidden outer tub. Pour half a cup of baking soda directly into the empty drum of the washing machine. Do not put it in the dispenser drawer, as it may clump and clog the lines. Baking soda is a natural deodorizer and a mild abrasive, making it perfect for breaking down organic compounds without scratching the stainless steel.
Select the hottest, longest wash setting available on your machine. Many modern machines have a specific setting labeled “Tub Clean,” “Sanitize,” or “Allergen.” If yours does not, select the “Heavy Duty” cycle with the hottest water temperature and an extra rinse if possible. Allow the machine to run through a complete cycle.
As the hot water mixes with the baking soda, it will slosh around the drum and into the outer tub, gently scrubbing away the “scrud” and neutralizing the acidic odors trapped within. Do not add any clothes or detergent during this process.
Step 4: Run the Vinegar Cycle
Once the baking soda cycle has completely finished and drained, it is time for the final cleaning phase. Pour two cups of white vinegar directly into the detergent dispenser drawer. If your machine is a top-loader, you can pour it directly into the drum as the water fills.
Run another complete cycle on the hottest water setting available. It is absolutely critical that you run the vinegar cycle separately from the baking soda cycle. If you mix them together, they will chemically react, bubble up, and neutralize each other, turning into basic saltwater that has very little cleaning power.
The hot vinegar will effectively dissolve any remaining hard water mineral deposits, scale, and soap scum that the baking soda loosened. Furthermore, vinegar is a mild disinfectant that will kill off any lingering mold and mildew spores hidden deep within the machine’s plumbing and pump system.
Step 5: Final Wipe Down and Air Dry
After the second cycle completes and the machine drains, the interior should smell fresh and clean. However, the job is not quite done. Take a clean, dry microfiber cloth and wipe down the entire inside of the stainless steel drum. Pay special attention to the inside of the glass door, as hard water stains can build up there.
Give the rubber gasket one final wipe to ensure no debris was flushed into it during the cleaning cycles. This manual wiping ensures that any loosened debris that didn’t drain away is completely removed and helps speed up the drying process of the interior components.
Step 6: The Golden Rule – Leave the Door Open
The single most crucial step in keeping your washing machine smelling fresh long-term is to establish a new laundry habit: always leave the door slightly ajar after every single use. If you shut the door immediately after removing wet clothes, you are trapping the residual moisture inside, restarting the mold growth cycle.
By leaving the door open (even just an inch or two), you allow fresh air to circulate and thoroughly dry out the interior. If you have a front-loader, leave the dispenser drawer pulled out slightly as well to allow that cavity to dry. This simple habit will prevent 90% of future odor issues.
⚠️ What Not to Do
Do not mix baking soda and vinegar in the same cycle. As mentioned earlier, they will neutralize each other and reduce their cleaning effectiveness to near zero. Always use them in separate cycles.
Avoid using too much detergent. More soap does not equal cleaner clothes. Modern HE machines require only a fraction of the detergent older models needed (often just 2 tablespoons). Excess soap creates the sticky residue that traps odors and dirt.
Ditch the liquid fabric softener. Liquid softeners are the leading cause of washing machine “scrud.” Consider switching to wool dryer balls or adding a half cup of white vinegar to the rinse cycle instead, which softens clothes naturally without leaving a film.
Do not use bleach frequently on the rubber seals. While bleach kills mold, it is a harsh corrosive chemical that can cause the rubber gasket to degrade, stiffen, and eventually crack over time, leading to expensive leaks.
How Often to Deep Clean Your Washer
The frequency of this deep cleaning routine depends heavily on your laundry habits, the climate you live in, and the type of machine you own.
As a general rule of thumb, you should perform this baking soda and vinegar deep clean once a month. This regular schedule prevents residue from building up to the point where it becomes a stubborn, smelly problem.
However, you may need to clean it more frequently (every two to three weeks) if you meet any of the following conditions:
- You live in a very humid climate where moisture struggles to evaporate.
- You frequently wash heavily soiled items, such as cloth diapers, mechanics’ work clothes, or heavily muddy sports gear.
- You consistently wash in cold water (cold water doesn’t dissolve detergent as well as warm or hot water).
- You have a front-loading machine and a large family, resulting in multiple loads per day.
Maintenance Tips & Prevention
To maintain a fresh washing machine between deep cleans, adopt these simple preventative habits. Wipe the rubber seal completely dry with a towel after your last load of laundry for the day. Always leave the door and the detergent dispenser slightly open between uses to promote vital airflow.
Run a hot water wash or “sanitize” cycle for your white towels or sheets at least once a week; the hot water will help flush out the system naturally. Finally, periodically check and clean the drain pump filter (usually located behind a small door at the bottom front of the machine), as trapped hair and coins can trap rancid water and cause severe odors.
❓ FAQ
Can I use this method on a top-loading washing machine?
Yes, this exact method works exceptionally well for top-loaders. Fill the tub completely with hot water, add the baking soda, and let it agitate for a few minutes to dissolve. Pause the cycle and let it soak for an hour before completing the wash. Then, repeat the entire process using the two cups of vinegar instead of baking soda.
Why does my machine smell like actual sewage?
A sewage smell often indicates a structural plumbing problem rather than an issue with the washing machine drum itself. It could mean the drain hose is inserted too far down into the standpipe, creating a vacuum, or the P-trap (the curved pipe that holds water to block sewer gases) has dried out. Ensure your drain installation meets the manufacturer’s specifications, and run water down the nearest floor drain to refill the trap.
Is it really necessary to remove the dispenser drawer completely?
Yes, removing the drawer is absolutely essential. Liquid fabric softeners and highly concentrated detergents form a thick, gelatinous sludge in the back of the drawer housing that mold feeds on aggressively. Simply pouring a liquid cleaner through it is rarely enough friction to remove this physical buildup.
Can I use bleach instead of vinegar?
While bleach is a powerful disinfectant, it is not recommended for regular maintenance. Bleach does not break down soap scum or mineral deposits (which are the food source for mold), meaning the mold will simply return. Additionally, bleach is harsh on rubber seals and can cause them to fail prematurely. Stick to vinegar for a safer, more comprehensive clean.
What if the smell returns immediately after cleaning?
If the smell persists immediately after deep cleaning, you likely have a clogged drain pump filter or a partial blockage in the drain hose itself. Locate the small access door at the bottom of your front-loader, place a towel down, and carefully unscrew the filter to remove any trapped debris causing the stagnant water smell.
Does washing in cold water cause odors?
Yes, exclusively washing in cold water can contribute to odors. Cold water is less effective at completely dissolving powdered and liquid detergents, leaving more residue behind in the machine. It also fails to kill bacteria effectively. Aim to do at least one hot water load per week to help flush the system.
Are commercial washing machine cleaners better than vinegar?
Commercial cleaners (like Affresh or Tide Washing Machine Cleaner) are formulated specifically to break down “scrud” and are very convenient. However, they are more expensive and contain synthetic chemicals. The natural vinegar and baking soda method is generally just as effective for routine maintenance and is much safer for the environment and your appliance’s rubber components.
✅ Bottom Line
A smelly washing machine entirely defeats the purpose of doing laundry. If your machine smells dirty, your clothes will not be truly clean. By using simple, natural, and inexpensive ingredients like baking soda and vinegar, you can effectively break down the hidden residue and mold that cause these unpleasant odors. Committing to routine monthly maintenance and ensuring proper ventilation by leaving the door open are the ultimate keys to keeping your machine fresh and your clothes smelling wonderful.