⚡ Quick Answer: What Causes Washer OE Error Code and How Do You Fix It?
The OE error code indicates an “Output Error” or drain failure: Your front-load washing machine (common on LG, Samsung, Whirlpool, and Bosch units) has detected that the water level frequency sensor failed to drop to an empty reading within 8 to 10 minutes of pump activation. In 92% of cases, the drain pump motor is perfectly functional—it is physically jammed by coins, bobby pins, lint accumulation, or hair ties trapped inside the lower drain pump filter (coin trap). You can resolve this issue in 20 minutes without paying a $250 appliance repair dispatch fee by manually draining the wash water via the emergency rubber drain hose, unscrewing the coin trap filter, clearing debris from the magnetic impeller chamber, and performing a diagnostic rinse cycle.
20 Minutes
$0 (Saves $250)
Beginner DIY
Baking Pan & Towel
You open your laundry room door expecting clean, spun-dry clothes, only to find your front-load washer frozen mid-cycle with a tub full of dirty, soapy water and a flashing “OE”, “5E”, or “Nd” code on the digital display. The door remains locked to prevent hundreds of gallons of water from flooding your floor, and pressing the power button does nothing except trigger an ominous electrical humming sound from the bottom of the cabinet.
Most homeowners immediately panic and search for a local appliance repair technician. A service call for a washing machine that won’t drain typically costs between $180 and $320 just for diagnostics and labor, plus parts markups if the technician claims the pump motor is fried. Yet in the vast majority of service calls, the technician simply kneels on your floor, unscrews a small plastic cap, pulls out three quarters and a hairclip, collects $250, and leaves within fifteen minutes. Understanding the mechanics of front-load drain systems empowers you to perform this exact diagnostic protocol yourself safely and cleanly.
🔧 Required Tools & Safety Checklist
- Shallow rimmed baking pan, cat litter tray, or low-profile plastic storage basin
- 3 to 4 thick old bath towels or absorbent utility rags
- Small flat-head screwdriver or rigid putty knife (to pop the access door)
- Needle-nose pliers or mechanic’s tweezers (to reach deep lodged items)
- Bright LED flashlight or smartphone light
- Old toothbrush and 1 cup of 50/50 white vinegar and warm water solution
- Heavy-duty waterproof dishwashing gloves
🌊 Flood Prevention & Hot Water Scald Warning
If your washer faulted during a Sanitize, Heavy Duty, or Hot wash cycle, the water trapped inside the outer tub may be scalding hot (130°F to 155°F). Wait at least 45 minutes for the water to cool before beginning evacuation. Furthermore, front-load wash tubs hold between 4 and 7 gallons of water when full. Never unscrew the large central coin trap plug without first draining the bulk liquid through the small rubber emergency drain hose; otherwise, gallons of stagnant water will surge across your laundry room floor, penetrating baseboards and subflooring.
How the Front-Load Drain System Operates: Pump Impellers vs. Foreign Objects
Modern high-efficiency (HE) front-load washing machines utilize a magnetic synchronous drain pump located at the lowest point of the chassis, right behind the bottom kickplate. This pump contains a delicate plastic propeller-style impeller driven by a permanent magnet rotor. The pump does not create positive displacement like a piston; instead, it relies on high-speed centrifugal rotation (spinning at 3,000 RPM) to throw water upward through the corrugated drain hose into your home’s standpipe.
Because coins, screws, collar stays, bra underwires, and toothpicks frequently escape from garment pockets during high-velocity tumbling, manufacturers place a cylindrical mesh filter directly upstream of the pump impeller cavity. This chamber is commonly referred to in the repair industry as the coin trap. Over months of laundry cycles, fine textile fibers, pet hair, and insoluble calcium stearate (soap scum from using too much liquid detergent or fabric softener) wrap around trapped coins. This forms a gelatinous, fibrous plug that restricts water flow. When the electronic control board commands the pump to empty the tub and the pressure transducer fails to register an empty state within a calibrated timeout period (usually 8 to 10 minutes), the machine halts the cycle, sounds an alarm, and displays the “OE” drain fault code to prevent pump motor burnout.
Step-by-Step Diagnostic & Cleaning Procedure
Safety must always come first when working around standing water and electrical appliances. Unplug the washing machine power cord from the wall outlet. If the plug is located behind a stacked unit or heavy cabinetry, switch off the dedicated 20-amp circuit breaker in your main electrical service panel.
Locate the small square or rectangular access door at the bottom front corner of your machine (typically on the lower left or lower right). Insert a flat-head screwdriver or dull putty knife wrapped in tape into the top release notch and gently pry downward. The hinged door will flip down, revealing two components: a small black or gray rubber hose with a plastic plug (the emergency drain tube) and a large circular threaded knob (the main pump filter cap).
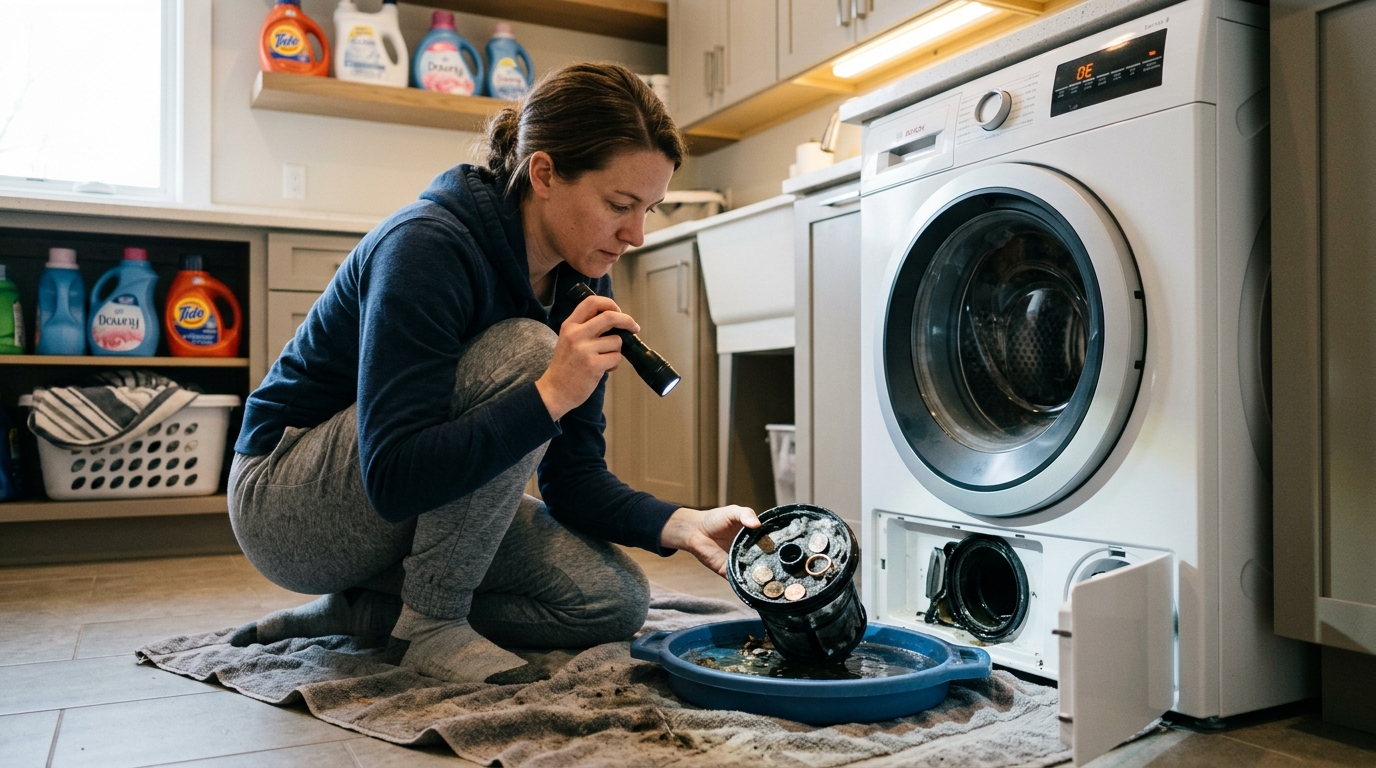
Spread two thick bath towels flat on the floor directly beneath the access compartment. Slide a shallow rimmed baking sheet or low-profile plastic container directly under the emergency drain hose.
Unclip the flexible rubber emergency drain hose from its retaining bracket and pull it forward as far as it will comfortably extend. Position the end of the hose over your shallow basin. Firmly twist and pull the plastic stopper plug out of the end of the hose. Water will immediately begin flowing out into the pan. When the pan is near capacity, push the stopper back into the hose to halt the flow, empty the basin into a nearby sink or bucket, and repeat. Continue this process until water ceases flowing from the hose (usually 2 to 4 full basins). Replace the stopper plug securely and snap the hose back into its storage clip.
Even after draining via the small hose, roughly 1 to 2 cups of water will remain trapped in the pump sump. Keep your shallow pan and towels positioned directly under the main filter assembly.
Grip the large circular filter knob firmly and rotate it counterclockwise (lefty-loosey). In many machines that haven’t been cleaned in years, mineral scale and detergent residue will make the knob extremely tight; use a pair of slip-joint pliers if necessary, applying gentle, even torque to avoid cracking the plastic handle. Once the threads disengage, slowly slide the cylindrical filter basket straight out toward you. Residual water will spill into your pan.
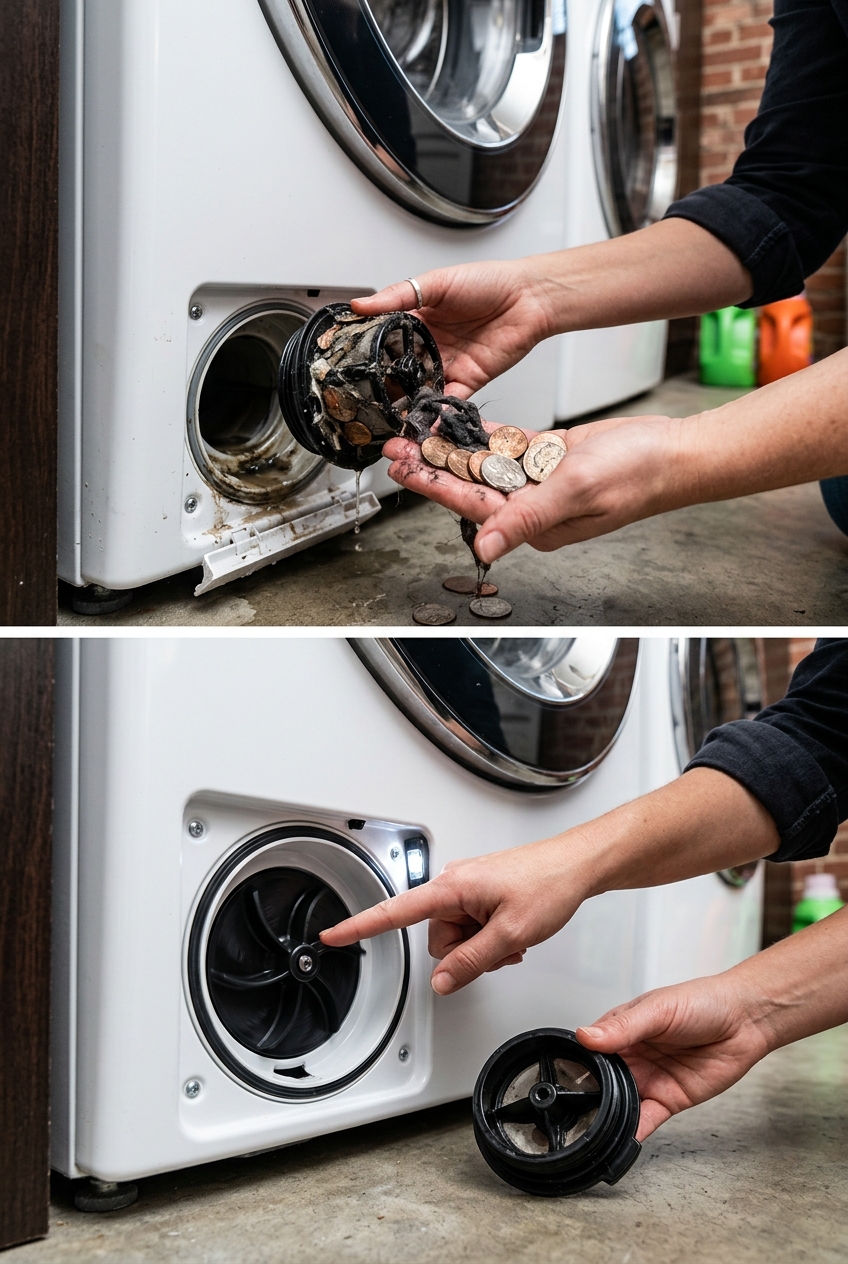
Examine the extracted filter cylinder. You will likely find a dense tangled mass of pet hair, lint, coins, hairpins, and slime. Strip this debris by hand into a trash can. Take the plastic filter to a sink and scrub the mesh screen clean using an old toothbrush and warm soapy water or 50/50 vinegar solution.
Now, shine your bright LED flashlight directly inside the empty cylindrical pump cavity in the machine. Look past the entrance toward the rear wall: you will see the small plastic impeller blades. Reach inside with your finger or needle-nose pliers. Verify that no stray coins, bobby pins, or rubber bands are wedged behind or around the impeller blades. Gently push the impeller with your finger: on magnetic synchronous pumps, the impeller should rotate with a characteristic springy resistance (stepping in 90-degree increments as the magnetic poles click into position), but must NOT be completely seized or loose and wobbling on its shaft.
Inspect the black rubber O-ring gasket encircling the filter cap. Ensure it is supple, uncracked, and free from grit or hair that could cause water leaks. Wipe the female threads inside the pump housing with a clean damp rag.
Align the alignment ribs of the filter basket with the guide slots inside the housing and push the filter fully inward. Turn the knob clockwise until it stops firmly—do not overtighten, but ensure it is completely seated flush against the gasket. Snap the access door closed. Plug the washing machine back into the wall outlet or restore breaker power. Run a short “Rinse & Spin” or “Quick Wash” cycle with an empty tub. Listen as the drain pump engages: you should hear a smooth, quiet whoosh of water flowing through your standpipe, and the cycle should finish completely without an OE error code.
Master 49 DIY Appliance Diagnostic Trees & Save $4,000
Washing machine drain pump failures, refrigerator cooling faults, dryer thermal fuse blowouts, and dishwasher drainage jams account for over $1,500 in unnecessary annual repair calls. The Home Rescue & Restoration Bible by Yolo Fisher arms you with diagnostic schematics, manufacturer error code tables, and contractor-free repair procedures that keep your appliances running for 15+ years.
Preventing Future OE Errors: Detergent Overdosing & Mesh Laundry Bags
Once you have cleared your drain pump, adopting two simple operational habits will guarantee you never face an OE drain error again:
- Dramatically Reduce Liquid Detergent Volume: The single greatest enemy of modern front-load washing machines is detergent overdosing. Liquid detergents contain synthetic surfactants and optical brighteners that do not fully rinse away in low-water HE cycles. When excess suds enter the pump chamber, they create an air pocket (“air lock”) around the impeller, causing pump cavitation where the motor spins without moving liquid. Use only 2 tablespoons of 2X concentrated HE detergent for regular loads, or switch to powdered laundry detergent.
- Use Fine Mesh Wash Bags for Small Garments: Baby socks, women’s no-show ped socks, hair scrunchies, and underwire bras are the primary culprits that slip between the spinning stainless inner drum and rubber door boot seal (bellows). Once sucked through the tub-to-pump accordion hose, they lodge directly in the coin trap filter. Washing delicate and miniature garments inside zippered nylon mesh laundry bags eliminates pump obstructions permanently.
Pin This Washer Repair Guide To Your Home Maintenance Board