⚡ Quick Answer: Why and How Often Should You Clean Refrigerator Condenser Coils?
Clean your coils every 6 to 12 months (or every 3 to 4 months in homes with shedding pets). Refrigerator condenser coils dissipate all the heat extracted from inside your freezer and fresh food compartments. When coated in pet hair, cooking grease, and airborne dust, the coils become thermally insulated. This forces the hermetic compressor to run almost continuously at elevated discharge pressures and temperatures, spiking electric utility bills by $10 to $18 per month and causing premature compressor burnout—a fatal appliance failure costing $900 to $1,400 to replace. You can clean them in 25 minutes using a 36-inch flexible cylindrical coil brush, a vacuum crevice tool, and a simple front or rear access procedure.
25 Minutes
$140 in Power
$1,200 Compressor
Beginner DIY
Your refrigerator is the hardest working appliance in your entire home. Unlike dishwashers, ovens, or washing machines that operate for an hour or two per day, a refrigerator operates 24 hours a day, 365 days a year, continuously cycling to maintain food preservation temperatures between 35°F and 38°F in the fresh food compartment and 0°F in the freezer. Yet despite being the single most expensive appliance in most kitchens, the vast majority of homeowners never perform the one simple maintenance procedure required to keep it alive: cleaning the condenser coils.
When condenser coils are neglected, the symptoms develop gradually. First, you notice the refrigerator running almost constantly without cycling off. Then the central mullion bar (the divider between your French doors) feels uncomfortably hot to the touch. Eventually, the compressor begins buzzing loudly, struggling to cool, until the internal thermal overload switch trips permanently. Replacing a failed refrigerator compressor requires an EPA-certified sealed system technician to recover refrigerant (R134a or R600a isobutane), braze copper tubing with an oxy-acetylene torch, pull a deep vacuum, and recharge the system. The total cost ranges from $900 to $1,500—often prompting homeowners to discard a repairable $2,500 refrigerator entirely. This entire nightmare can be prevented with a $12 coil brush and twenty minutes of routine care.
🧹 Required Cleaning Tools & Equipment Checklist
- 36-inch flexible cylindrical refrigerator condenser coil brush with stiff nylon bristles
- Canister or wet/dry shop vacuum with narrow flexible crevice attachment tool
- 1/4-inch and 5/16-inch magnetic nut drivers or screwdriver set (for rear access panels)
- High-intensity LED flashlight or headlamp
- Damp microfiber cloth for wiping the condenser fan shroud and drain drip pan
- Cardboard sheet or appliance floor sliders (to protect hardwood/vinyl when moving fridge)
- Heavy-duty work gloves and light dust mask (for airborne pet dander and dust)
⚡ Electrical & Refrigerant Tubing Safety Caution
Always unplug the refrigerator from the electrical receptacle before servicing coils or fans. The condenser fan motor operates on 120V AC and can start unexpectedly without warning. Furthermore, never use metal knives, wire coat hangers, or sharp screwdrivers to scrape dirt from coils. Modern refrigerators utilize thin aluminum or copper tubing containing flammable R600a hydrocarbon refrigerant at pressures up to 150 PSI. Puncturing a coil releases refrigerant, rendering the refrigerator inoperable and creating a serious fire hazard. Use only soft-bristle nylon coil brushes and plastic vacuum nozzles.
The Thermodynamics of Condenser Coils: Why Heat Trapping Kills Compressors
To understand the physics of cooling, remember that a refrigerator does not actually “create cold.” Instead, it operates on a closed vapor-compression thermodynamic cycle that physically extracts thermal energy from inside the insulated food cabinet and transfers that heat into the ambient air of your kitchen.
The hermetic compressor pumps low-pressure vapor refrigerant into a superheated, high-pressure gas (often exceeding 160°F). This hot gas flows through the serpentine wire condenser coils located either beneath the unit or on the lower rear panel. An axial condenser fan blows room-temperature kitchen air across the exterior coil surface. As heat transfers from the refrigerant into the passing air, the gas condenses into a high-pressure liquid, ready to pass through the expansion capillary tube into the interior evaporator.
When dust, pet hair, and airborne aerosolized cooking oils settle across the coil grid, they form an insulating thermal blanket. Heat transfer efficiency drops by 40% to 70%. Unable to reject heat into the room, the internal refrigerant pressure and compressor operating temperatures skyrocket. The synthetic polyolester (POE) lubricant inside the compressor breaks down into acidic sludge under continuous 200°F+ heat, causing mechanical bearing seizure and motor winding insulation failure. Keeping coils clean ensures rapid heat exchange, lower head pressures, and minimal electrical consumption.
Step-by-Step Execution: Professional Refrigerator Coil Maintenance
First, unplug the power cord from the electrical wall outlet. Next, identify the architectural layout of your refrigerator’s condenser system:
- Under-Cabinet Forced-Air Coils (Most Modern French Door & Side-by-Side Units): Located beneath the floor of the refrigerator, accessible from either the front base kickplate or the lower rear service panel.
- Rear Mounted Static Coils (Older & Budget Top-Freezer Units): Form a large black serpentine wire grid mounted externally across the entire back exterior wall of the refrigerator.
- Top Mounted Coils (High-End Built-In Sub-Zero Style Units): Located behind a hinged decorative metal grille above the upper doors.
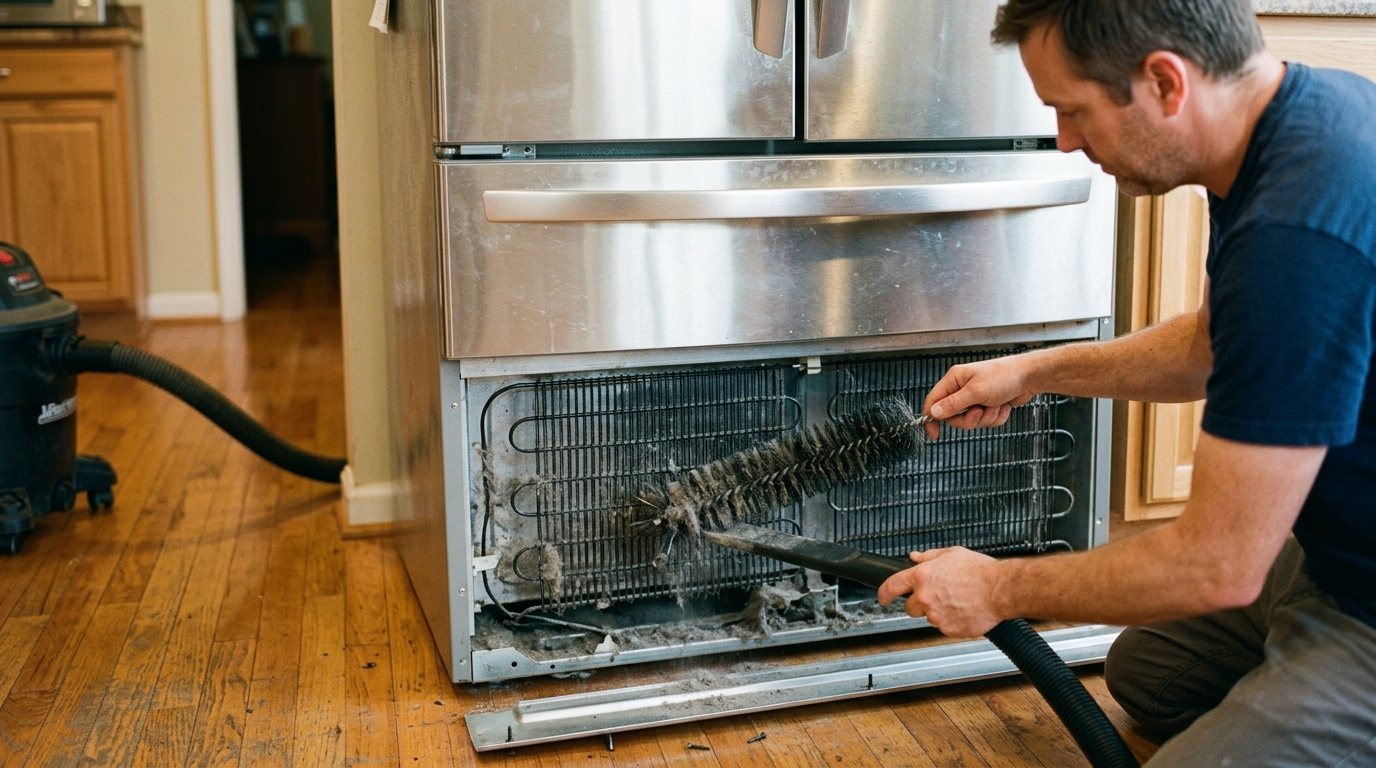
For standard bottom-coil units, open both refrigerator doors. Grasp the plastic base grille (kickplate) at both ends. On most Whirlpool, GE, and Frigidaire models, the grille snaps off by pulling firmly straight forward; on Samsung and LG models, you may need to remove one or two Phillips screws. Set the plastic grille aside.
If your refrigerator has not been deep cleaned in years, or if you have multiple pets, you should also clean from the rear. Pull the refrigerator carefully out from the cabinetry, sliding cardboard under the wheels to protect your flooring. Using a 1/4-inch or 5/16-inch magnetic nut driver, remove the 4 to 6 sheet metal screws securing the cardboard or galvanized metal lower service panel at the bottom rear. Remove the panel to expose the compressor, fan assembly, and coil housing.
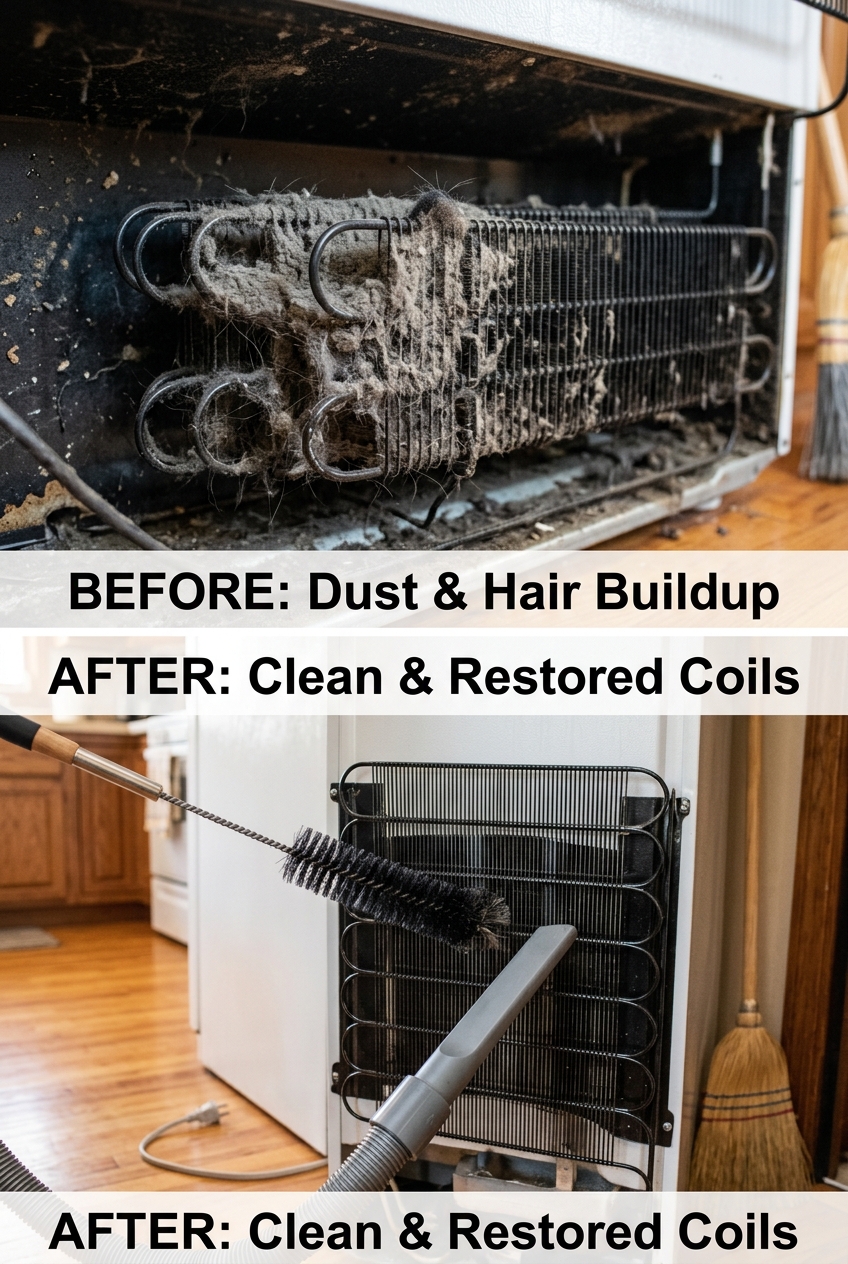
Shine your flashlight into the coil compartment. You will likely see thick gray felts of matted dust, pet fur, and lint clogging the spaces between the wire fins.
Insert your 36-inch flexible cylindrical coil brush into the channels between the metal tubes. Gently push the brush all the way in and pull it back out, twisting slightly to snag pet hair and dislodge crusty dust clumps from the coils. The flexible wire core of the brush bends easily to navigate curved tight spaces without kinking or bending the refrigerant lines. Work systematically across the entire width of the coil bank from top to bottom.
Attach a narrow plastic crevice nozzle or flexible micro-vacuum hose kit to your canister or wet/dry vacuum. Turn on the vacuum and hold the nozzle directly adjacent to where you are brushing to suck up airborne dust before it circulates into your kitchen.
Thoroughly vacuum all loosened dust piles from the base floor, the coil fins, the compressor exterior casing, and the wiring harnesses. Repeat brushing and vacuuming until the bare black or silver metal of the coil tubing is clearly visible and light shines freely through the fin spacing.
While the rear access panel is open, inspect the black plastic condenser fan motor and fan blade located next to the compressor. This fan pulls cool room air across the coils. Dust frequently accumulates on the curved leading edges of the fan blades, reducing aerodynamic airflow by up to 30%.
Gently wipe the fan blades clean with a damp microfiber cloth. Spin the fan blade with your finger: it should rotate freely with zero binding, squeaking, or wobble. Check the plastic condensation drain pan beneath the compressor; wipe away any dried mineral sludge or mildew with warm soapy water. Finally, reinstall the rear access panel, push the refrigerator back into position, snap the front base grille back onto the front, and plug the power cord into the wall outlet.
Double the Lifespan of Your Home Appliances and Save $4,000
Did you know that 83% of premature refrigerator, dryer, HVAC, and water heater replacements are caused by simple neglect of heat-exchange surfaces? Chapter 2 of The Home Rescue & Restoration Bible by Yolo Fisher reveals preventative maintenance schedules, thermal diagnostics, and contractor-killing restoration protocols that keep household appliances running for 20+ years.
Long-Term Maintenance Schedule for Homes with Shedding Pets
Pet hair from dogs and cats poses a disproportionate threat to refrigerators because pets naturally shed near the kitchen floor where under-cabinet condenser fans create constant low-velocity vacuum suction. In homes with Golden Retrievers, German Shepherds, or long-haired cats, coils can become severely clogged in just 90 days.
Mark your calendar every six months (or quarterly if you have multiple pets). You will know your coils are clean when you hear the compressor cycle off smoothly after running for only 15 to 25 minutes at a time, the cabinet sides feel cool to the touch, and your monthly electric bill reflects reduced kilowatt-hour demand. A 25-minute investment twice a year ensures your food remains safe and saves you thousands in premature appliance replacement costs.
Save This Refrigerator Care Guide To Your Maintenance Board